Excel Animations Project
This was a very creative project done in Math class. We bettered our skills in Excel, by making learning about different transformations like rotation, dilation, translation, and reflection and making fun GIF's! Click below to see our project timeline, and deliverables.
Step one.
First, we learned about the different transformations we could apply to a shape when it was graphed. Our teacher created a online workbook to teach us how to do each one. This workbook, helped serve as a guide if we were ever lost on the equations we needed to use. It proved to be very helpful, and I referred to it many times. Also, she gave us an example of the final product we were going to make...a GIF! To see, click link.
Step two.
Next, we were put into partnerships and created our own shape to try out each of the transformations. My partner and I made a fly, that looks a bit more like a butterfly. We created out own excel workbook and tested every transformation. They are harder than you would think. We had to learn the different equations to write, and to me it very much relates to coding. Check out the excel wordbook!
Step three.
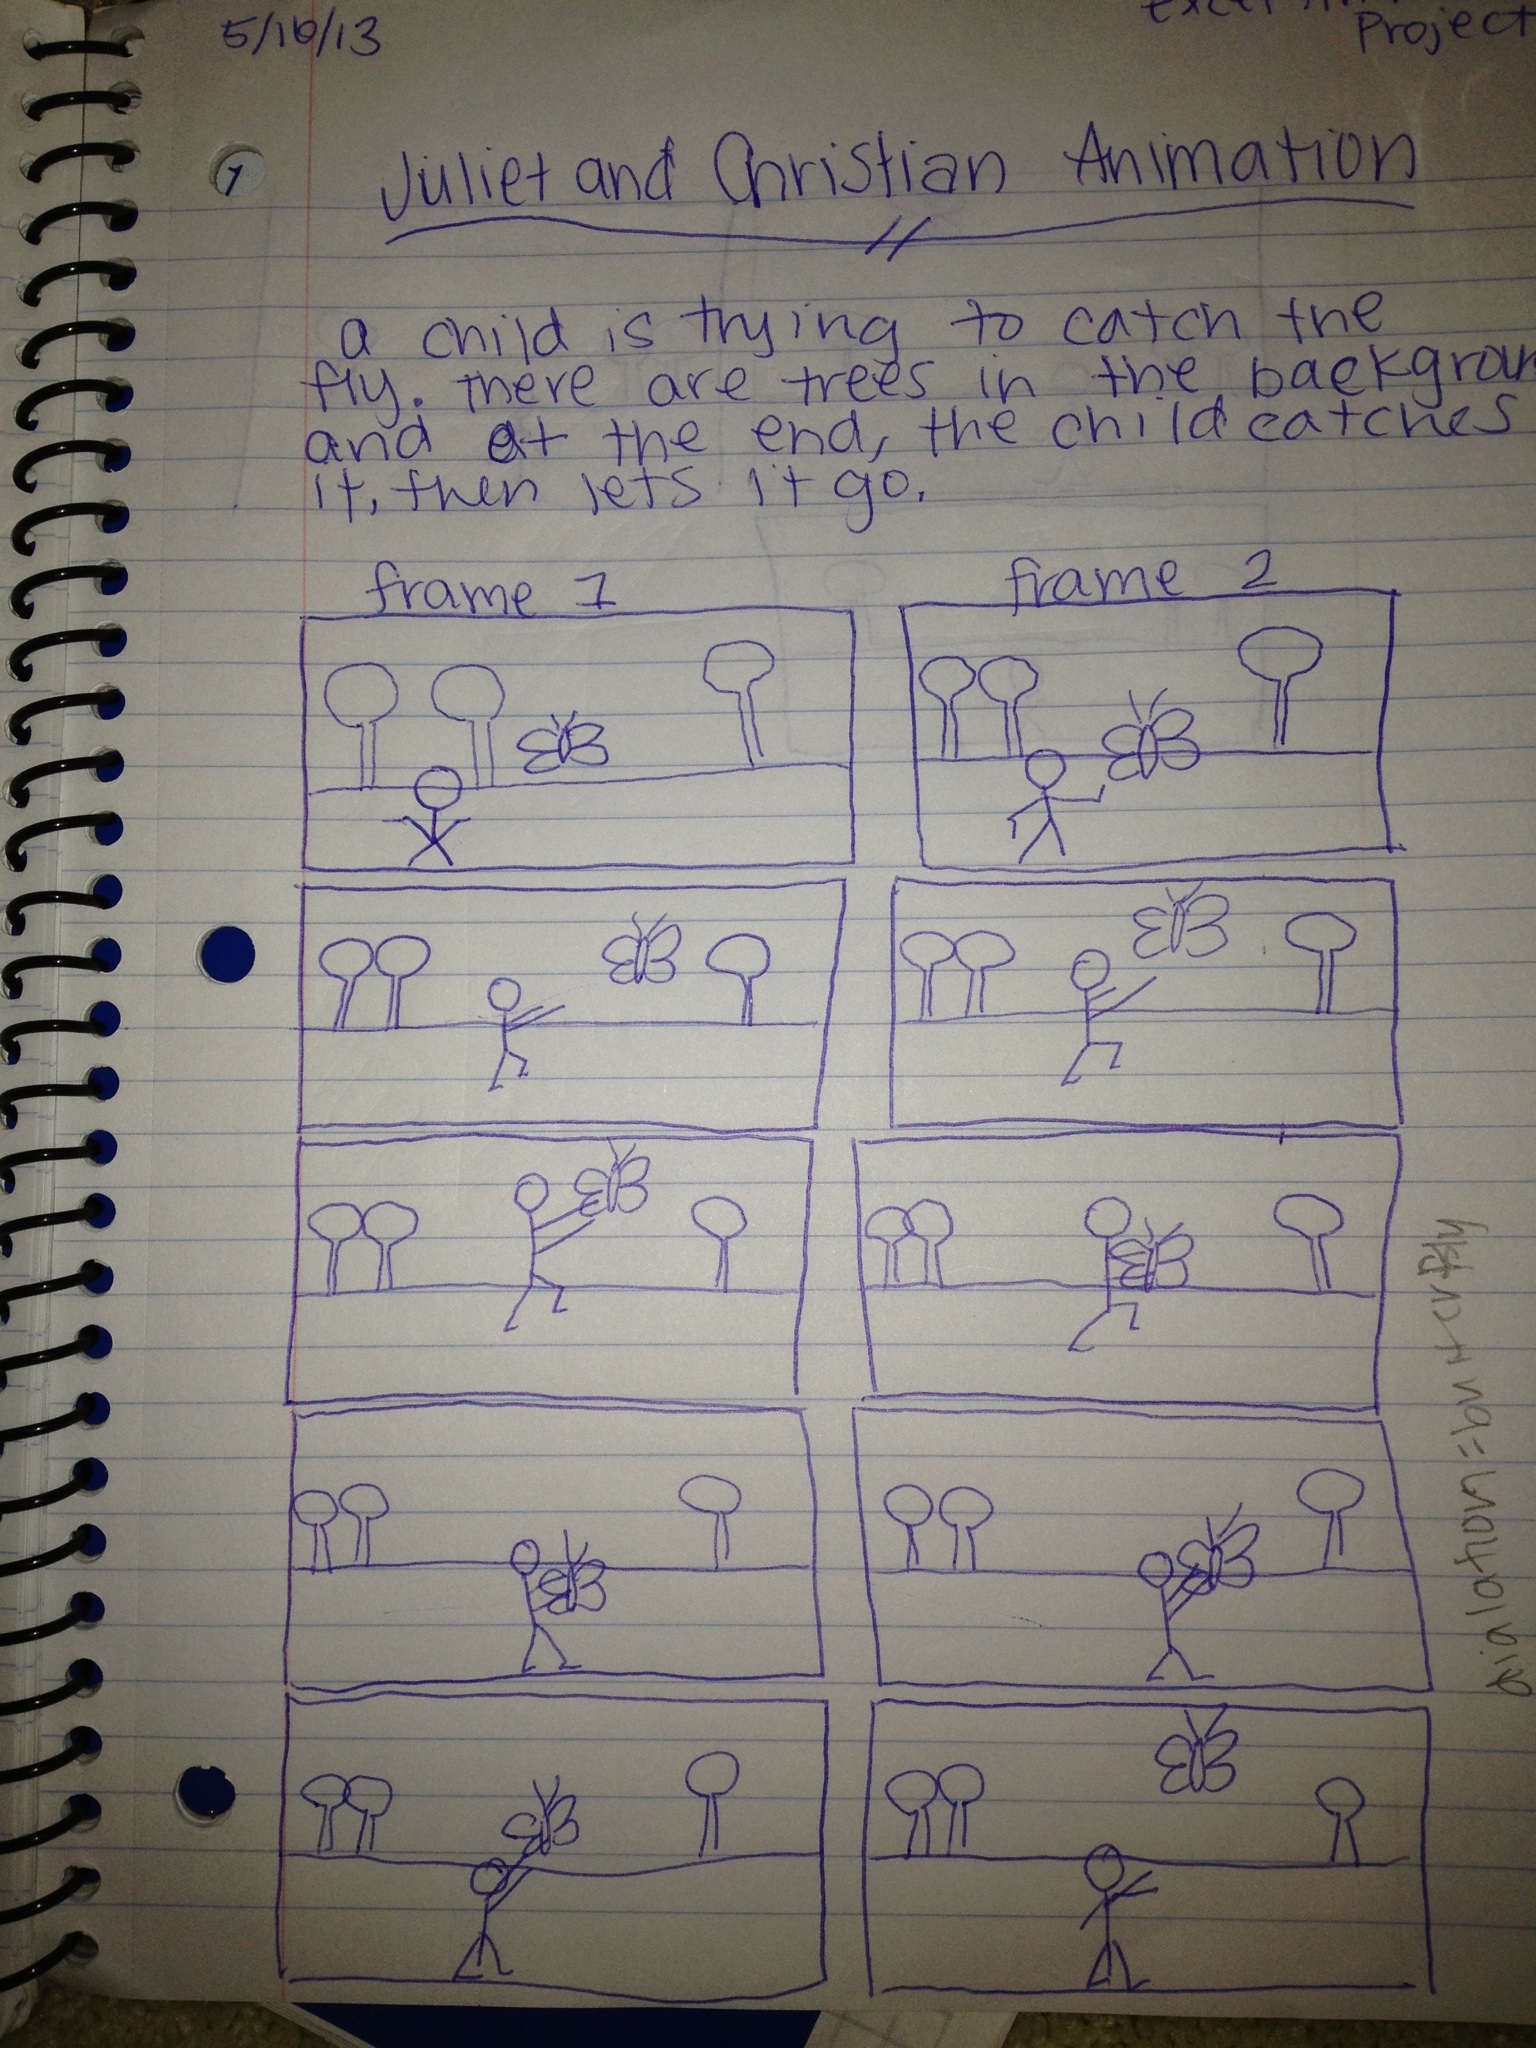
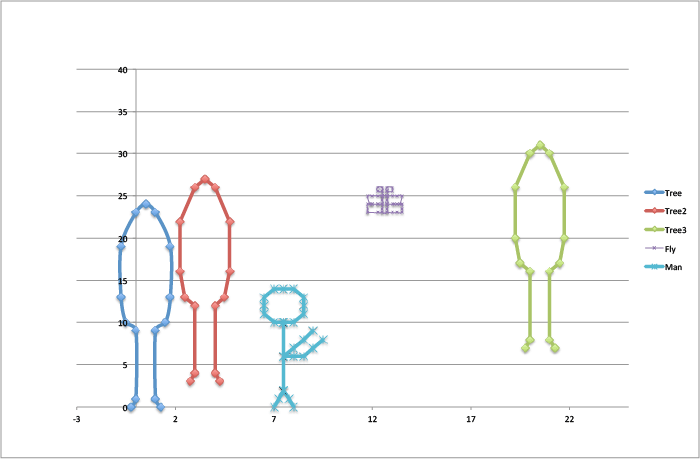
As a partnership, we started planning what we wanted to happen in our GIF. My partner and I decided we were going to have a person trying to catch the fly. Whatever we wanted our GIF to be, it had to have three different subjects, 10 slides, and three different types of transformations. Our three subjects were the fly, a man, and trees. We made a story board to show what would be happening overall. To see, click below.
Step four.
Next, we graphed out each part of our story and put them into excel. We made it so there were multiple transformations on certain subjects to make them move in certain ways. It was a difficult task, but it ended up working very well. We did all equations and numbers in one workbook with one graph. This way, we could use the same graph, and make the subjects move around it. This was easier than making a separate graph for each slide. To see this excel file click below.
Step five.
Every time I changed sometime about the graph, I would paste it into photoshop. This made one photoshop file with mulitple layers, each layer was a different slide. I then used the animation tool, to piece them together making a short video. This was turned into a GIF and made my final piece. To see my photoshop file, click below.
Step six.
Lastly, we exported the file as a GIF, and this was the final product.
